
Toronto & GTA
Tub to Shower Conversion
Most tubs in the GTA don't get used. They take up floor space, make a small bathroom feel smaller, and turn into a daily obstacle for anyone who'd rather shower than bathe. We remove the tub and replace it with a properly waterproofed, fully finished walk-in shower — done right, with the waterproofing and tile work that determine whether it lasts for years or leaks behind the wall in two.
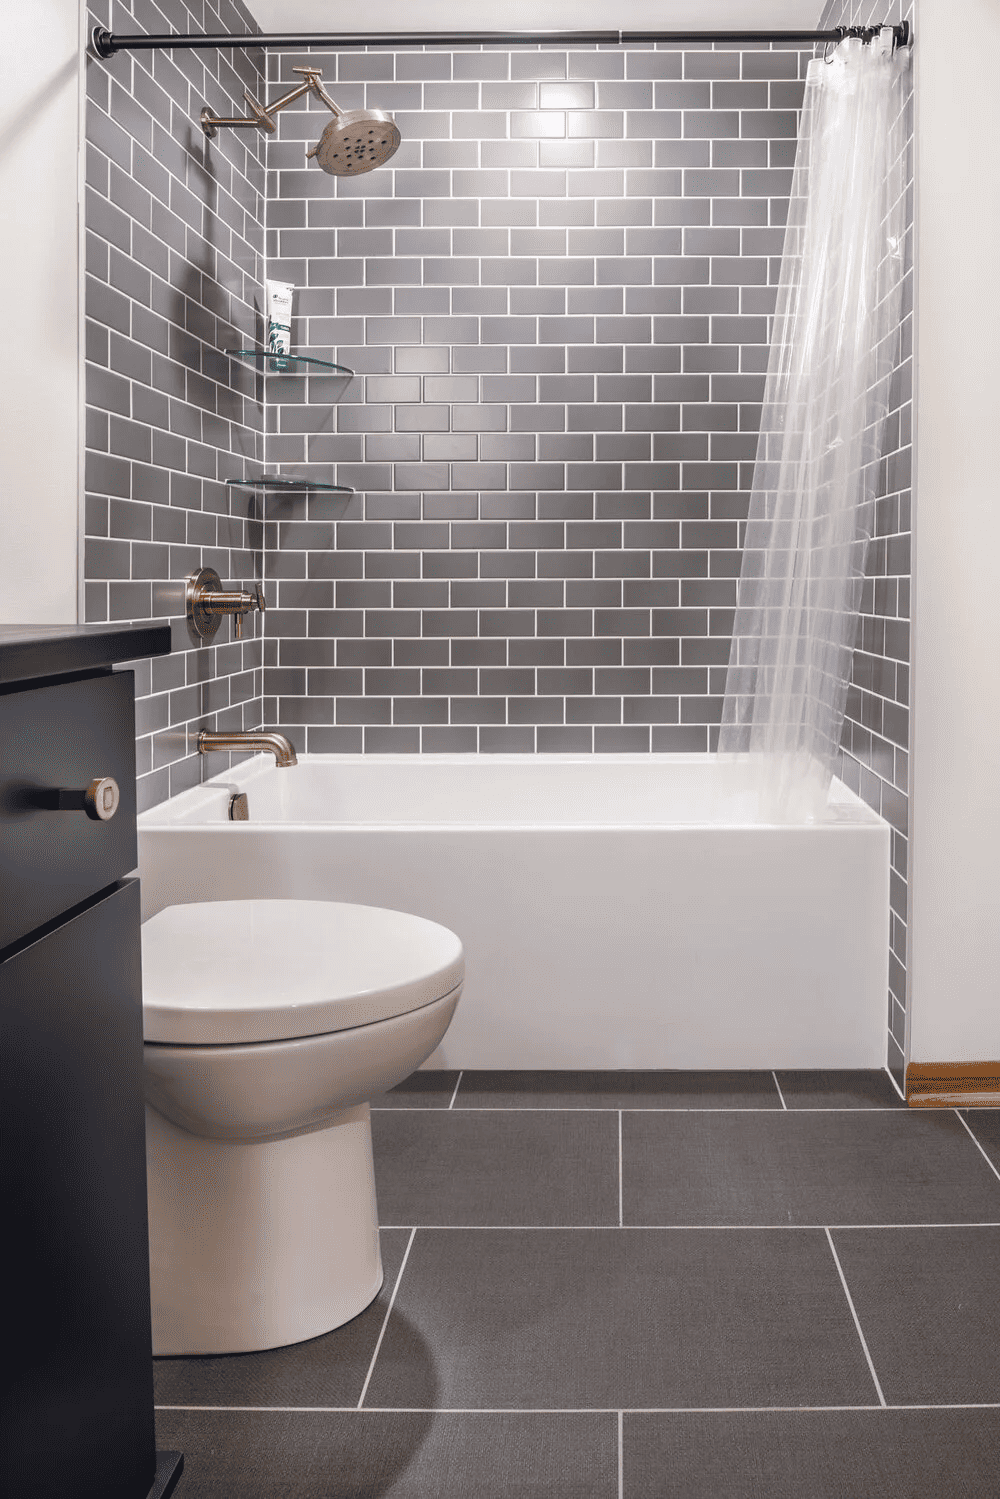
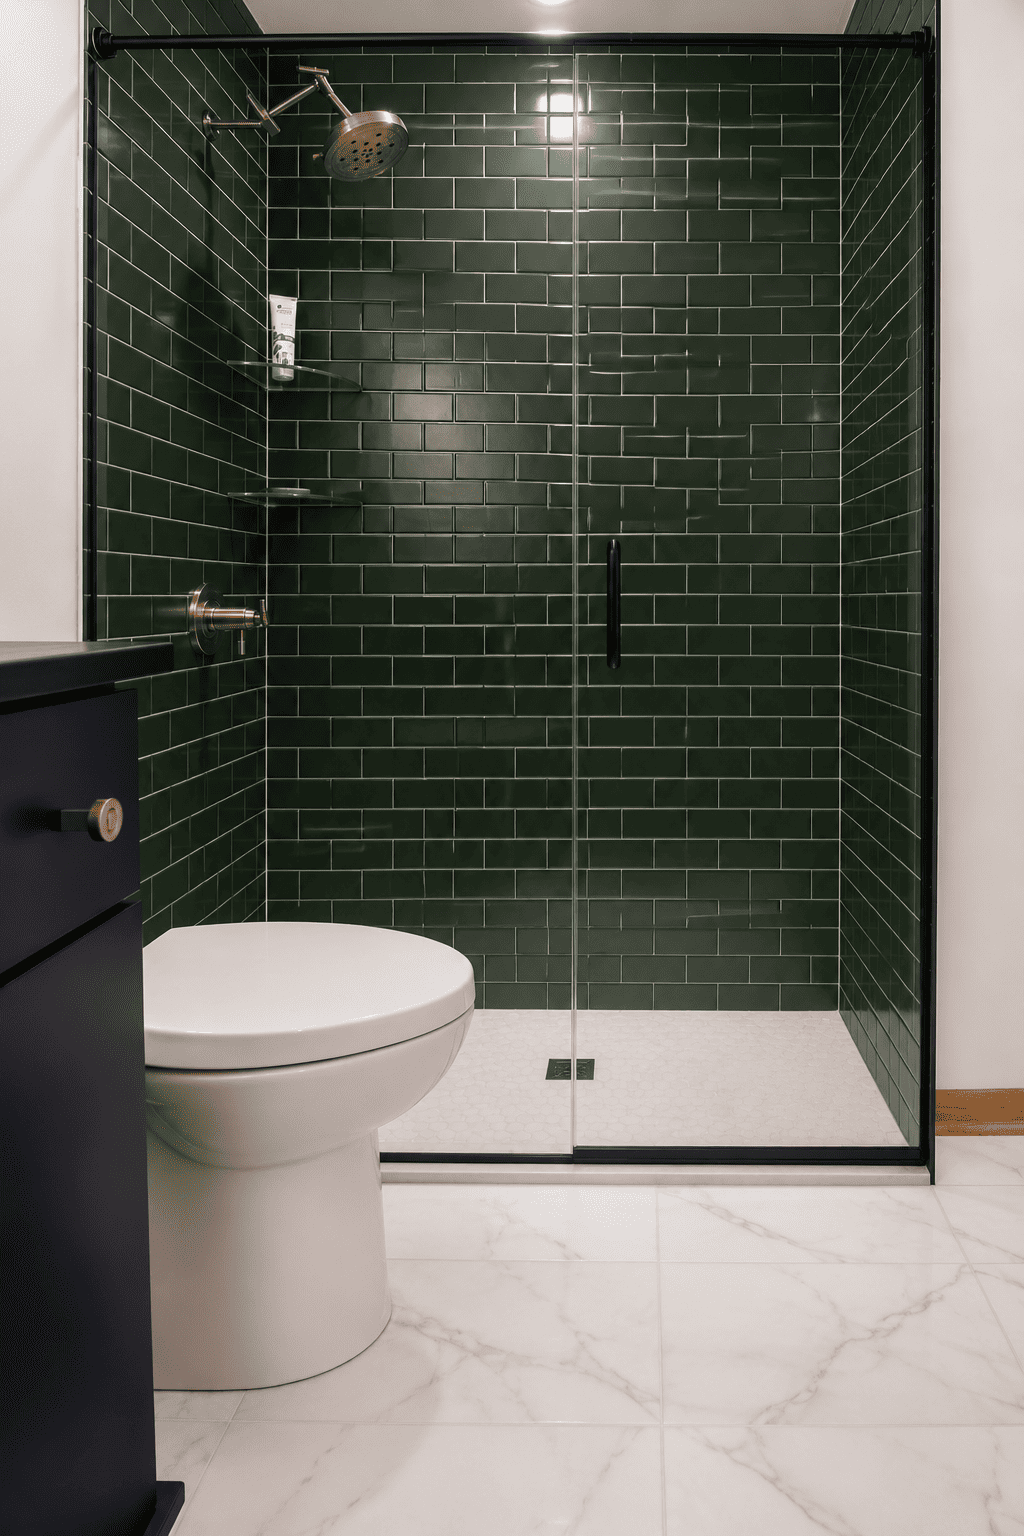
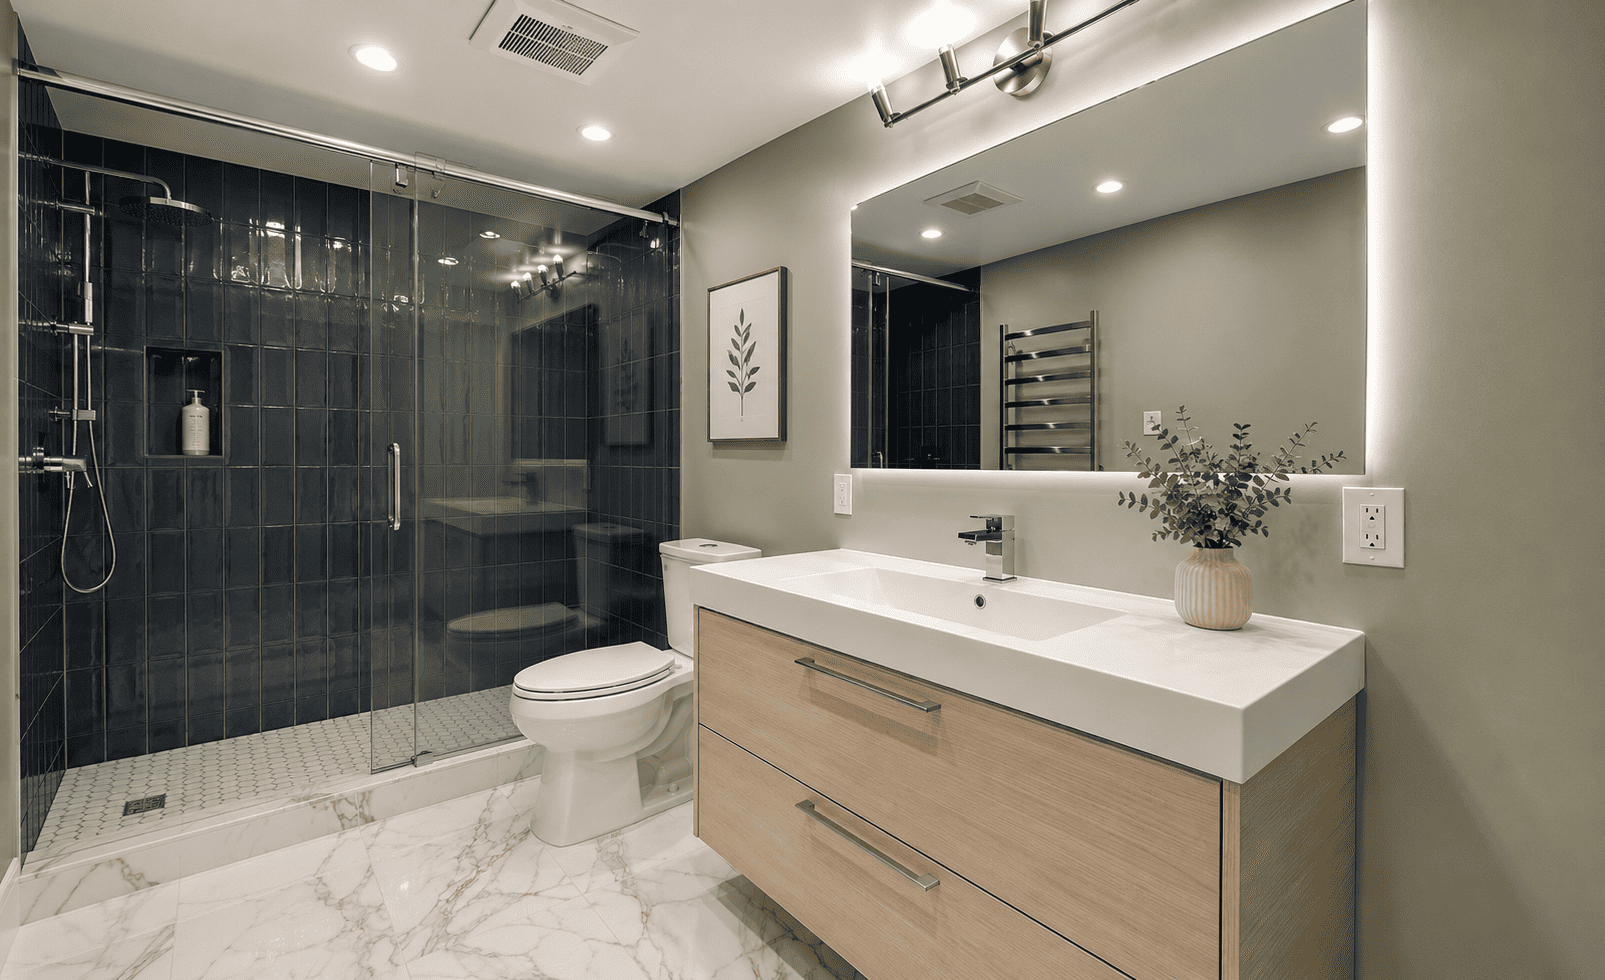
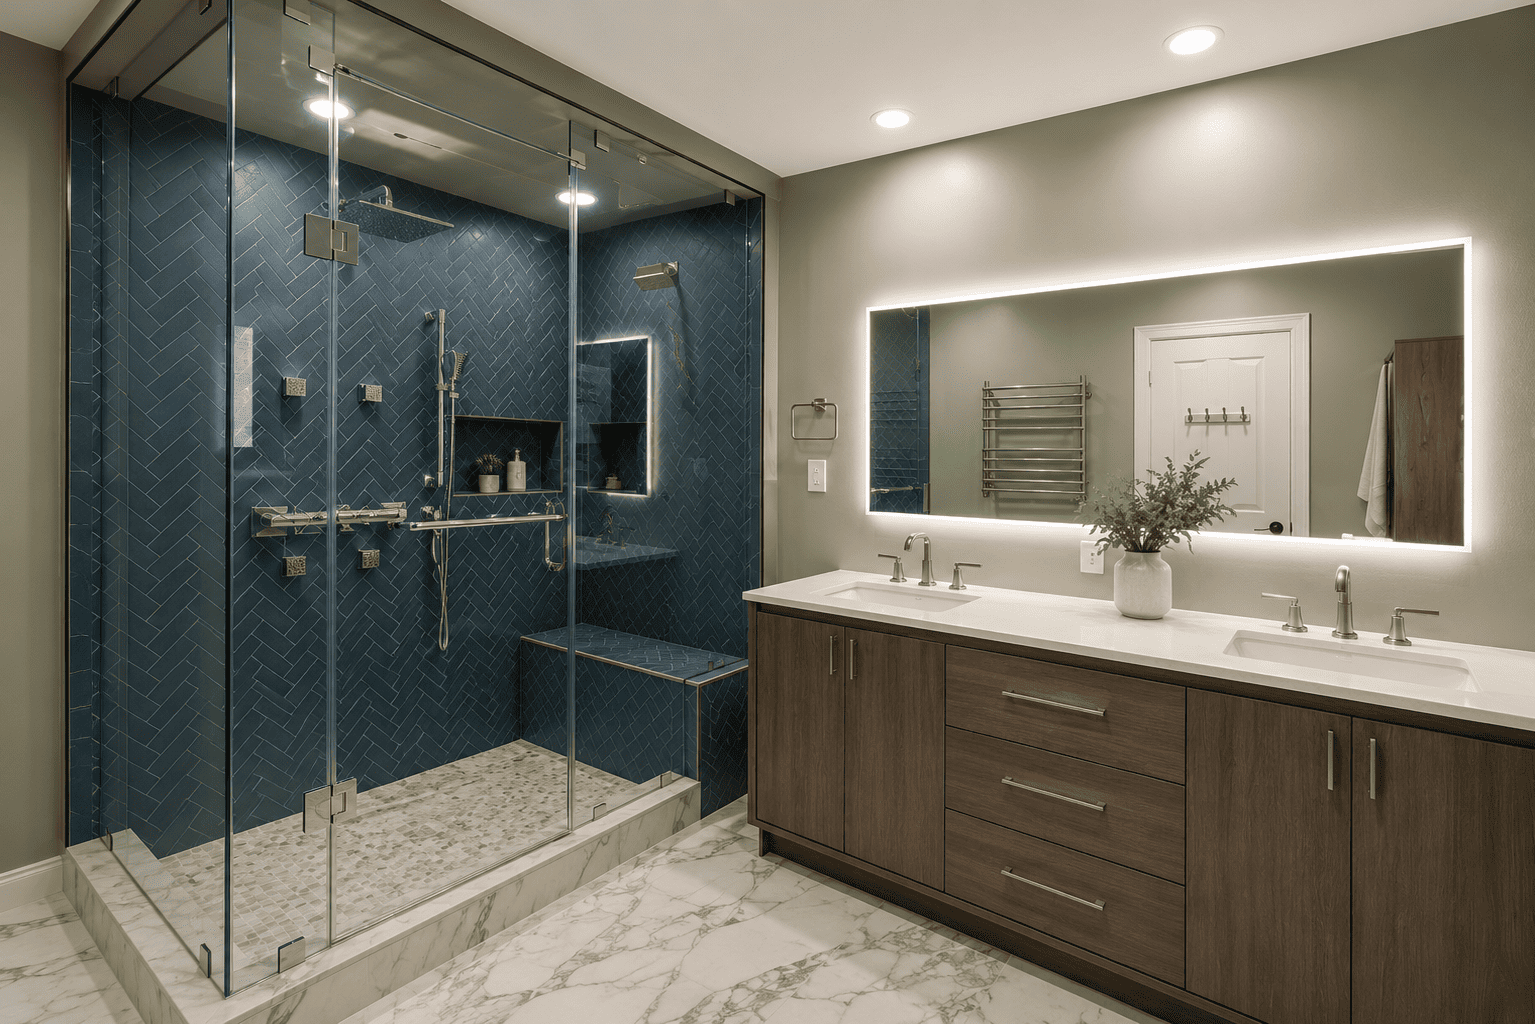
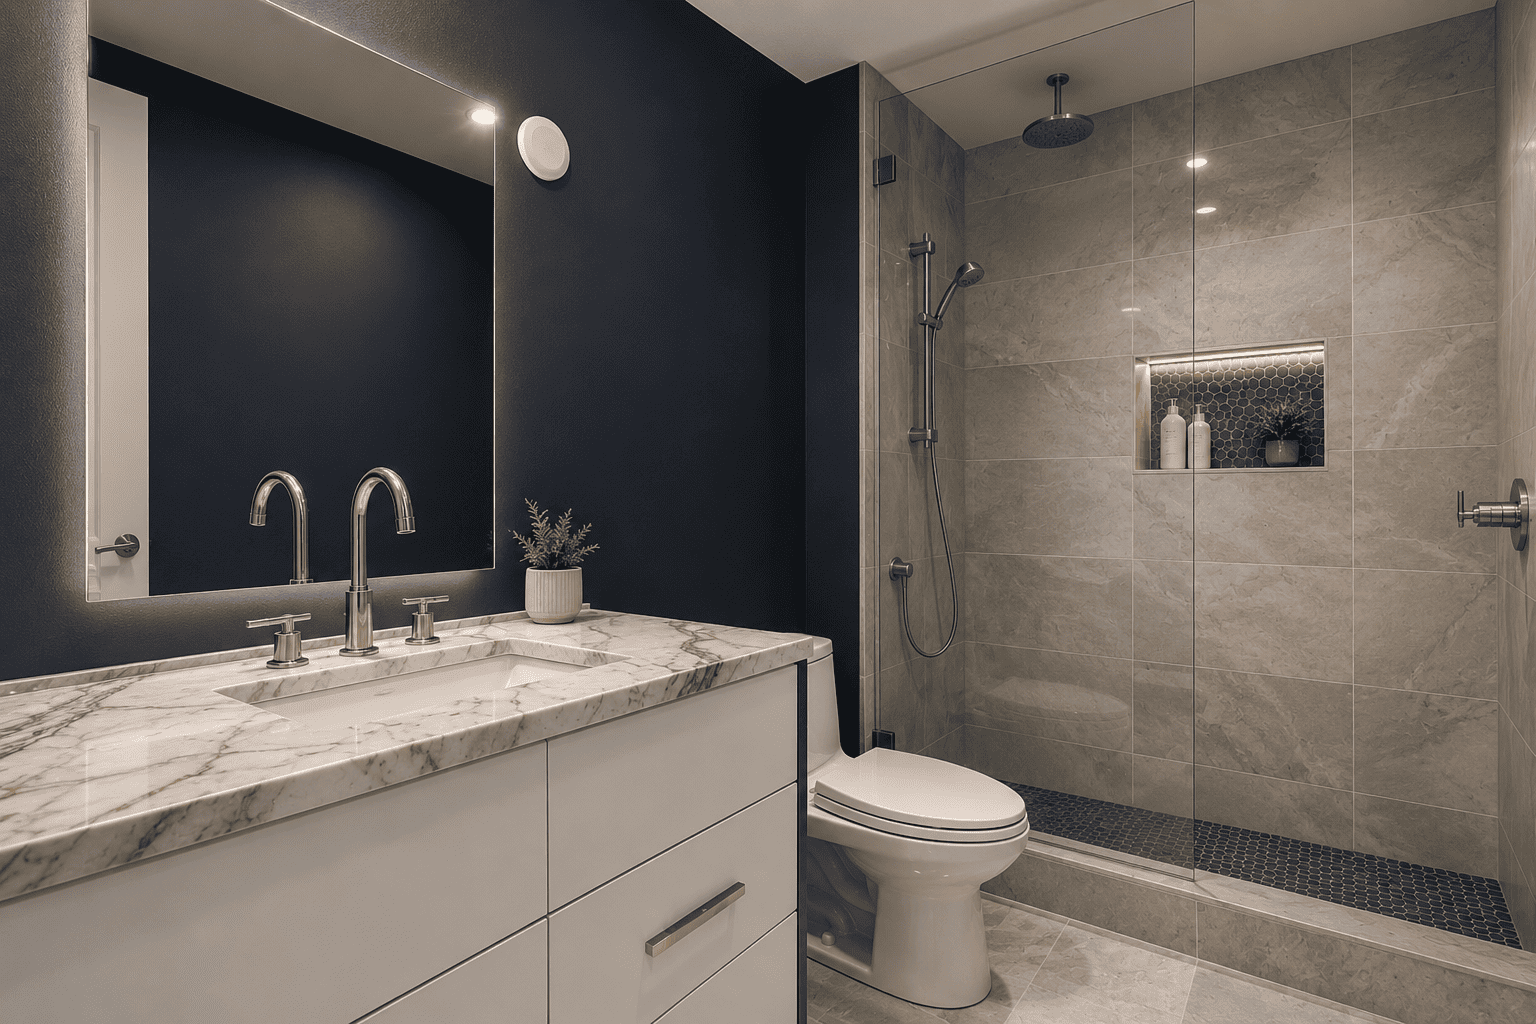
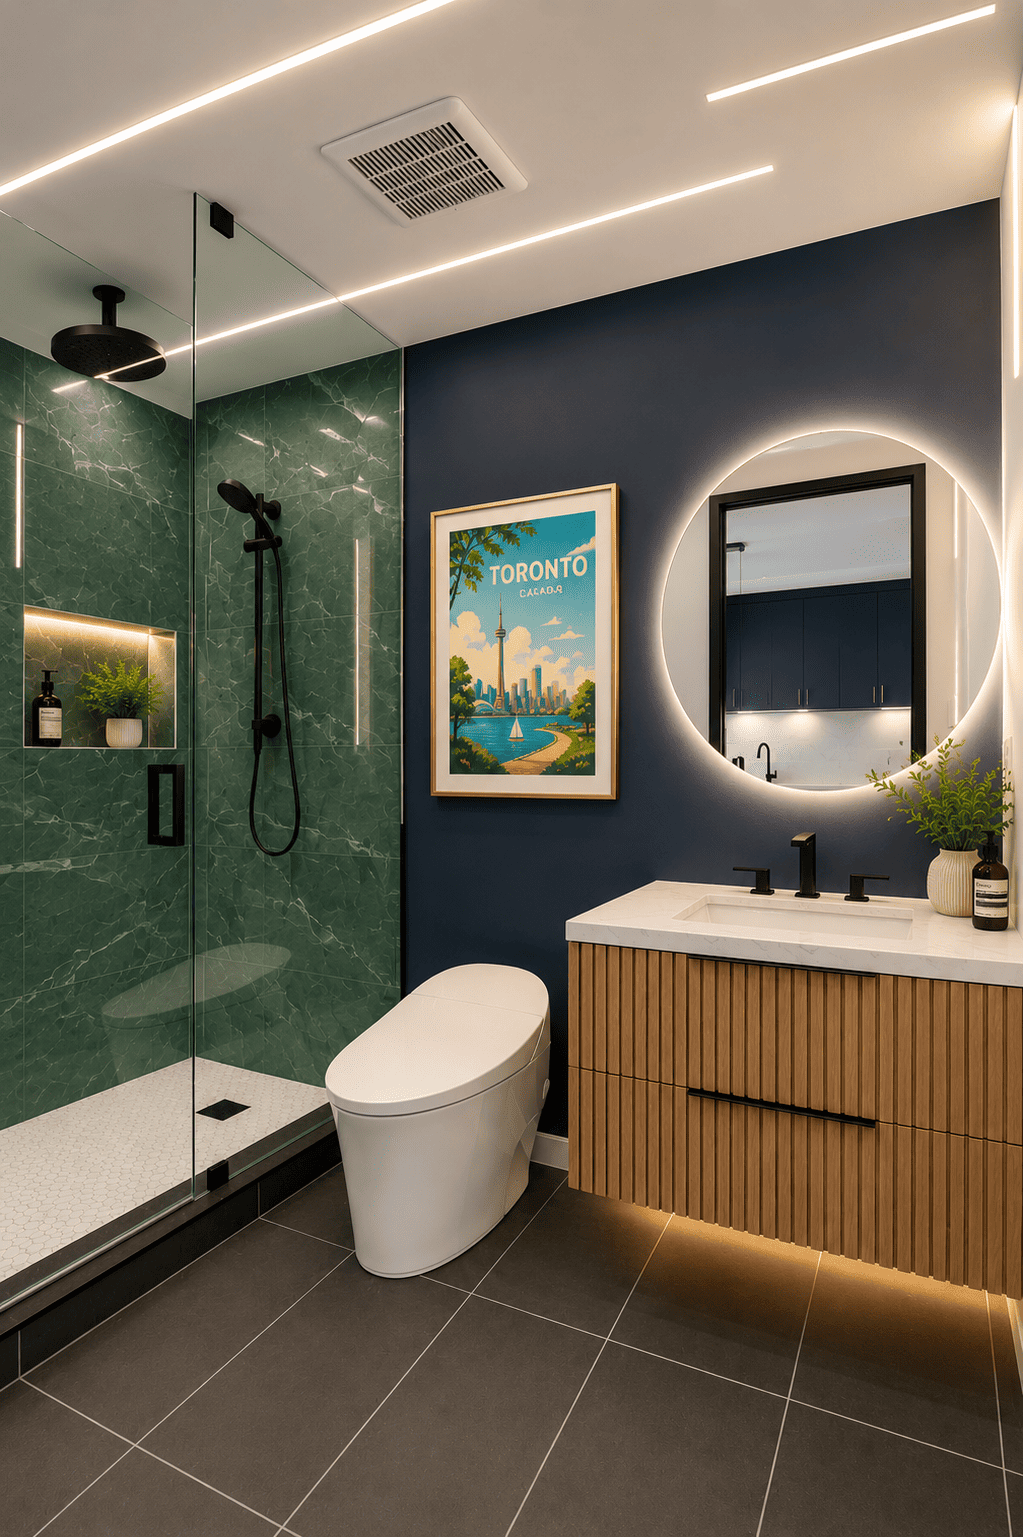
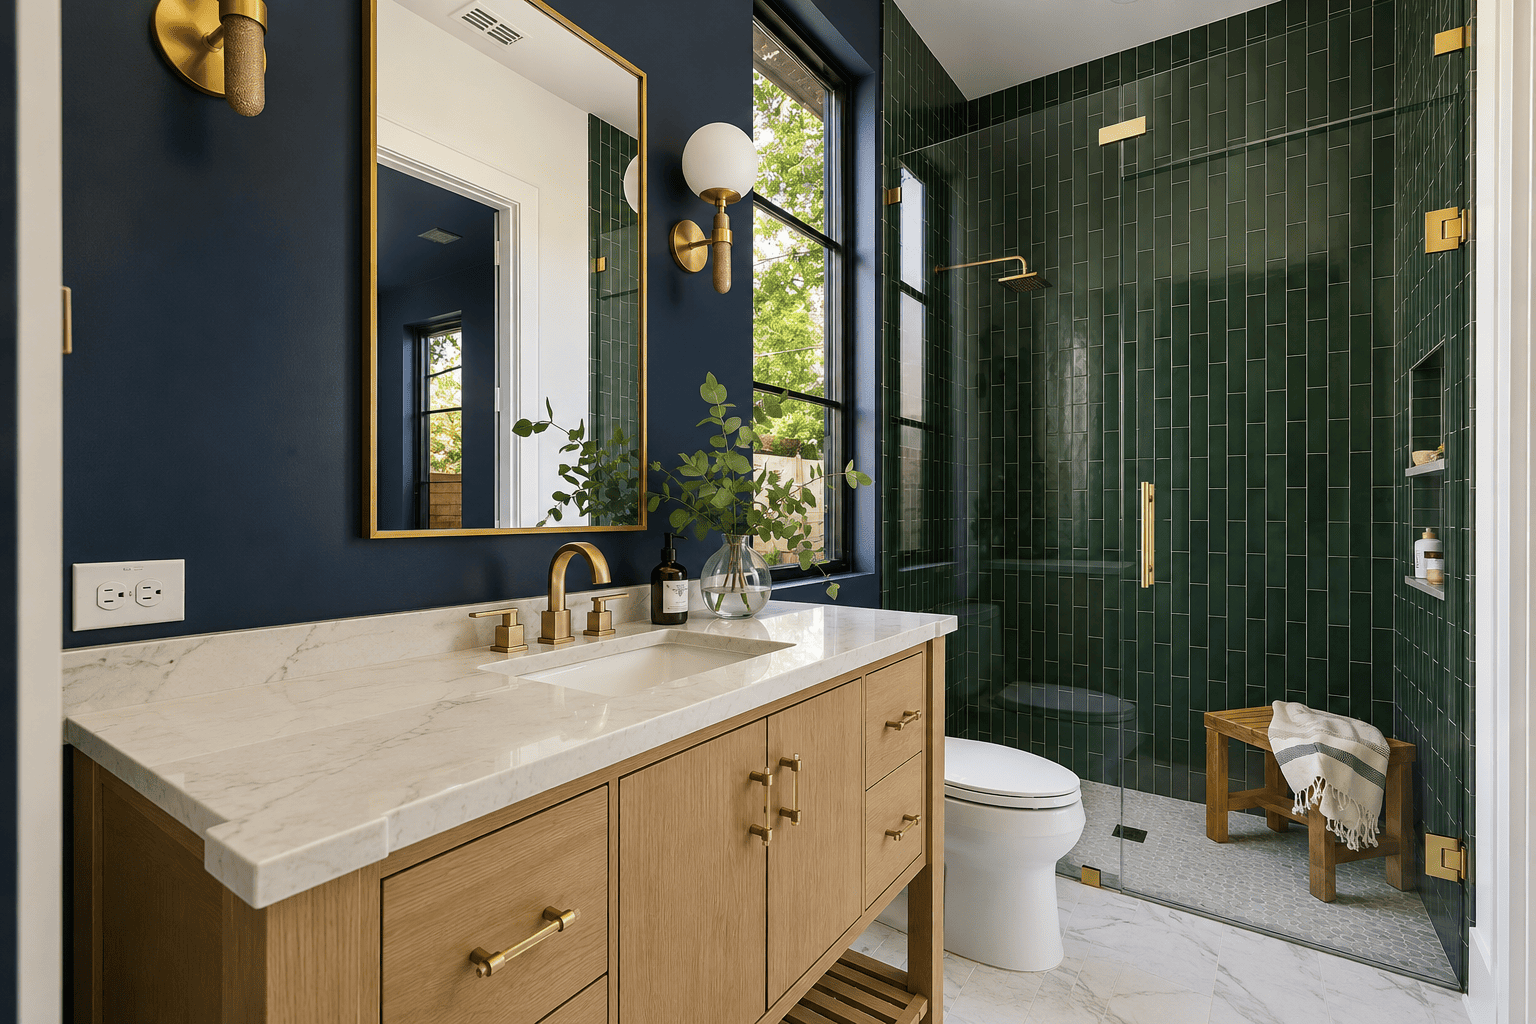
Recent tub-to-shower conversions in Toronto
Real completed projects from Toronto condos and houses across the GTA. Multiple before-and-after composites.

The case for converting
Why homeowners convert
Reclaim space
A walk-in shower almost always feels larger than a tub-shower combo, even in the same footprint.
Easier daily use
No stepping over a tub wall — a real benefit whether you’re in your 30s with bad knees or planning ahead.
Resale appeal
In a home with more than one bathroom, converting an underused tub is a common, well-received upgrade.
Modern look
Either acrylic or tile looks far better than a dated fibreglass tub-shower unit.
One honest note on resale: if it's your only bathroom, we'll talk through whether keeping a tub-shower combo makes more sense before you commit — happy to give a straight opinion either way.
What's involved
A tub-to-shower conversion isn't “remove tub, install shower.” Six steps, in a specific order, with no shortcuts. The work behind the tile is what determines whether the shower holds up for ten years or starts leaking in two.
Step 01
Protection & demolition
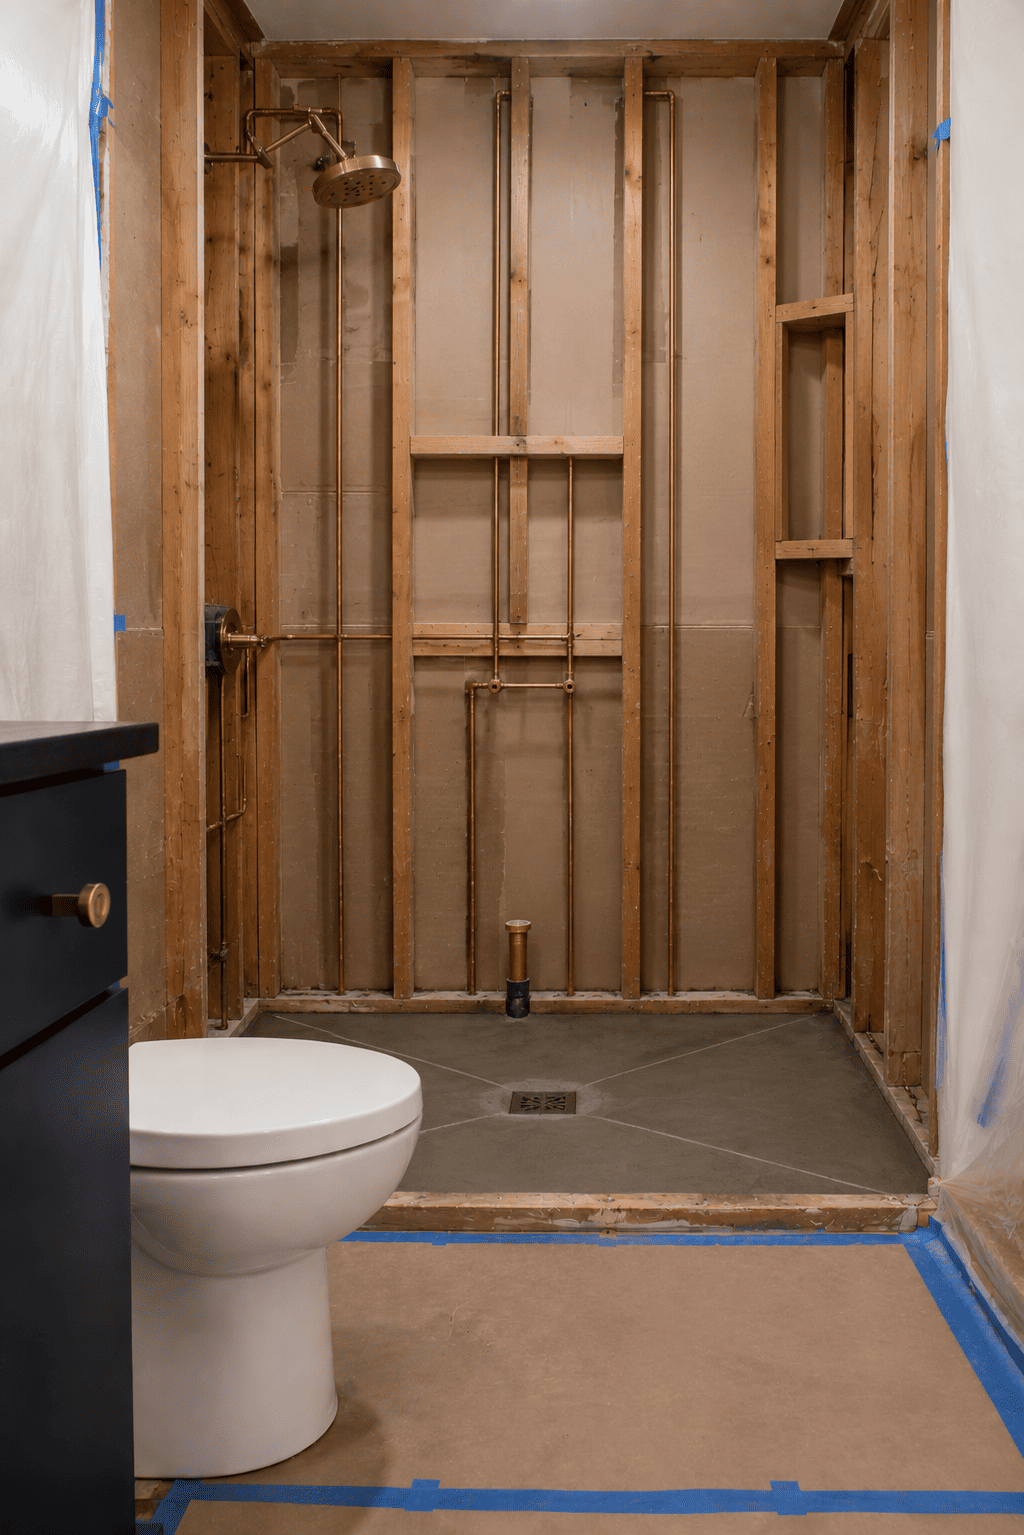
Floors get covered, the path from the front door gets covered, and anything we're not touching gets sealed off — drywall dust travels further than people expect. Then the tub comes out: surround off, tub disconnected from the drain and supply, lifted out in one piece if possible. Any drywall that's swelling, soft, or stained gets cut back to clean studs. We finish the day with the rough opening fully exposed so we can see exactly what we're working with before any new material goes in.
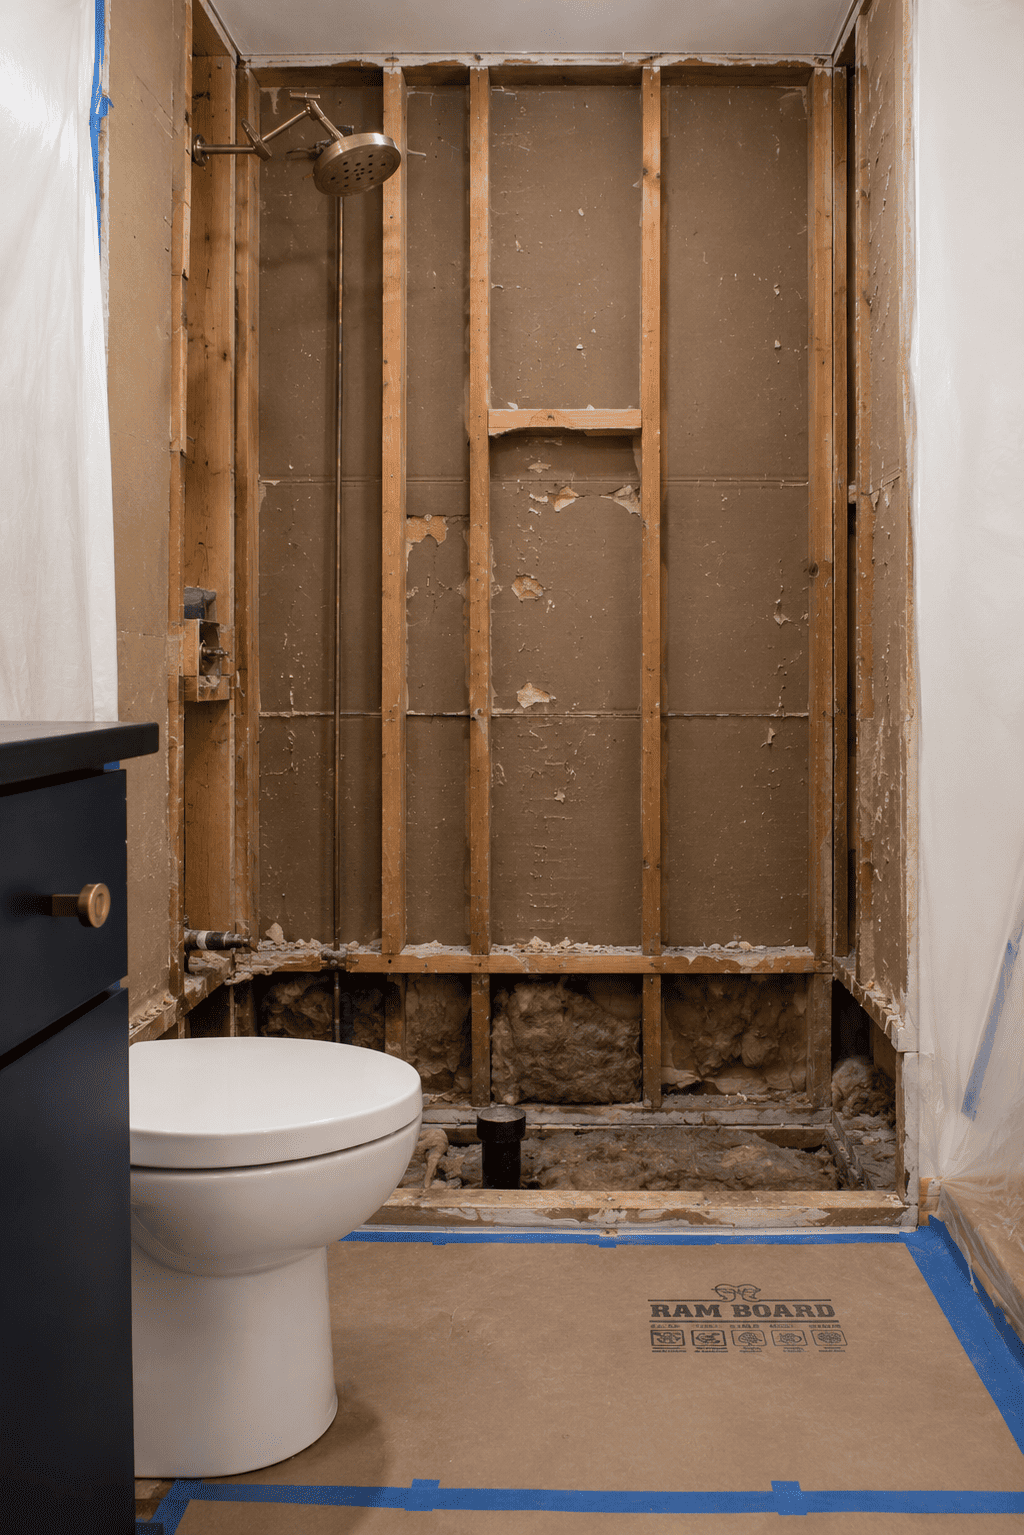
Step 02
Plumbing
The old tub had its drain in one spot, the new shower needs it somewhere else. We open the subfloor, reroute the drain to the new layout, and set the slope — every shower floor needs a quarter-inch per foot toward the drain, and curbless conversions need that slope dialed even tighter so water doesn't pool. The shower valve gets repositioned to standard height, the showerhead rough-in goes in, and everything gets pressure-tested before the walls close up. Mistakes here are the kind you only discover after the tile is set.
Step 03
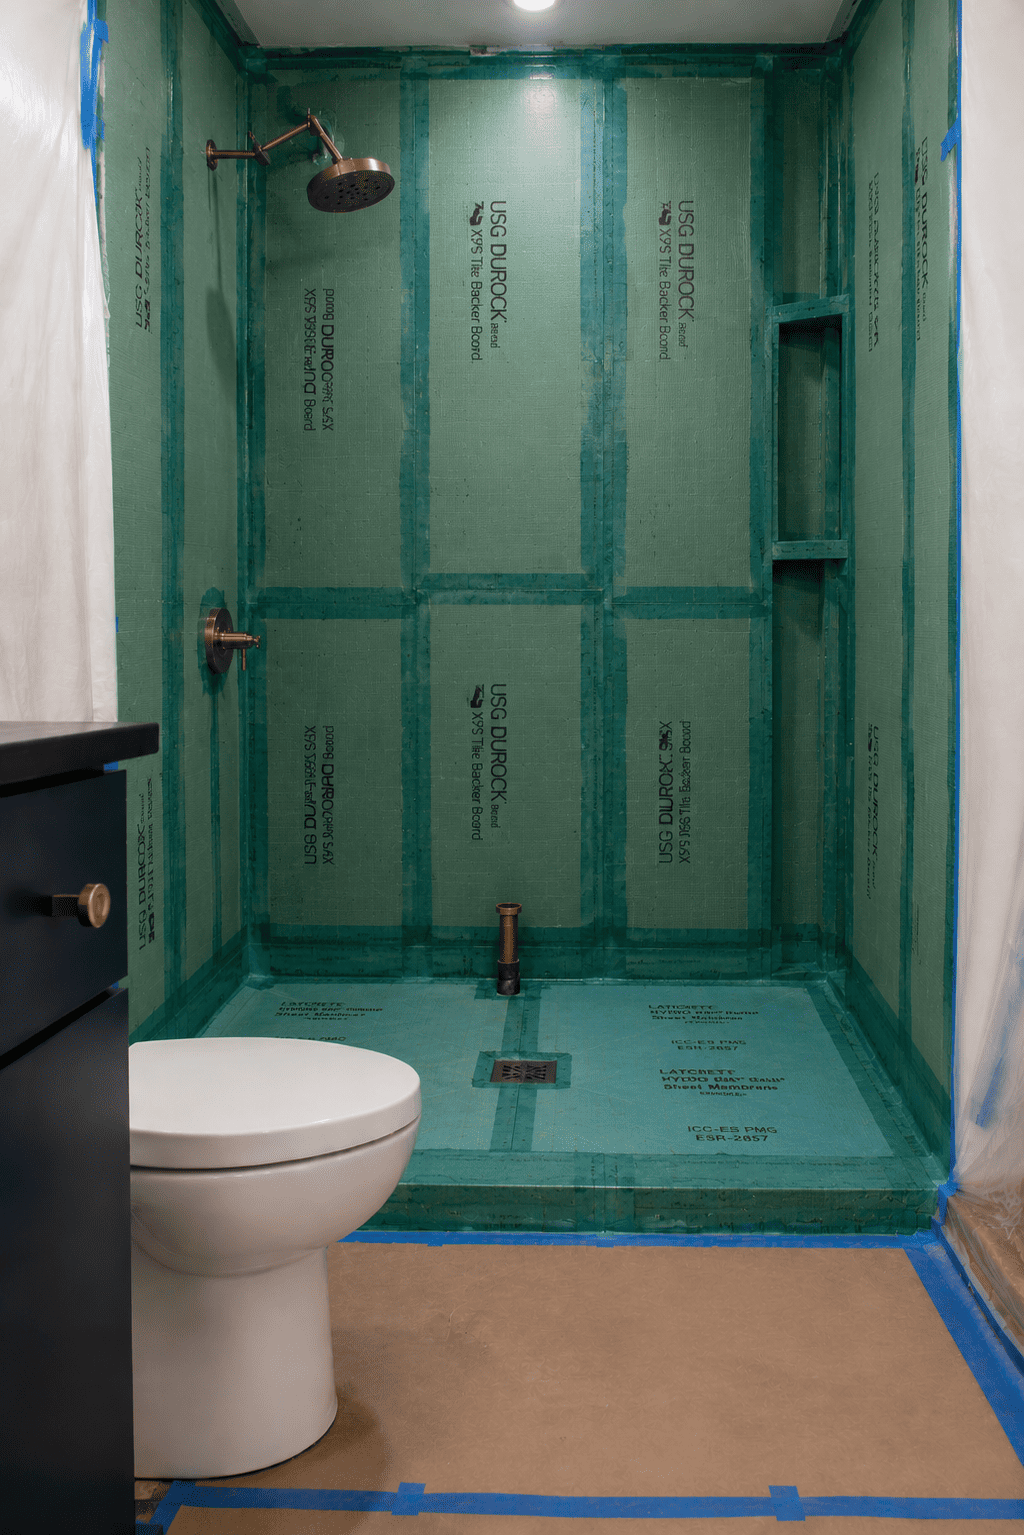
Waterproofing
This is the step that decides whether the shower lasts ten years or starts leaking behind the tile in two. XPS foam board goes on the walls — closed-cell, dimensionally stable, won't absorb moisture even if the membrane somehow gets compromised. A sheet membrane covers everything, with seams banded and sealed at every corner and penetration. Then we flood-test the pan — water in, drain plugged, leave it overnight, check the level in the morning. If anything's leaking, we find it now while it's still a five-minute fix.
Step 04
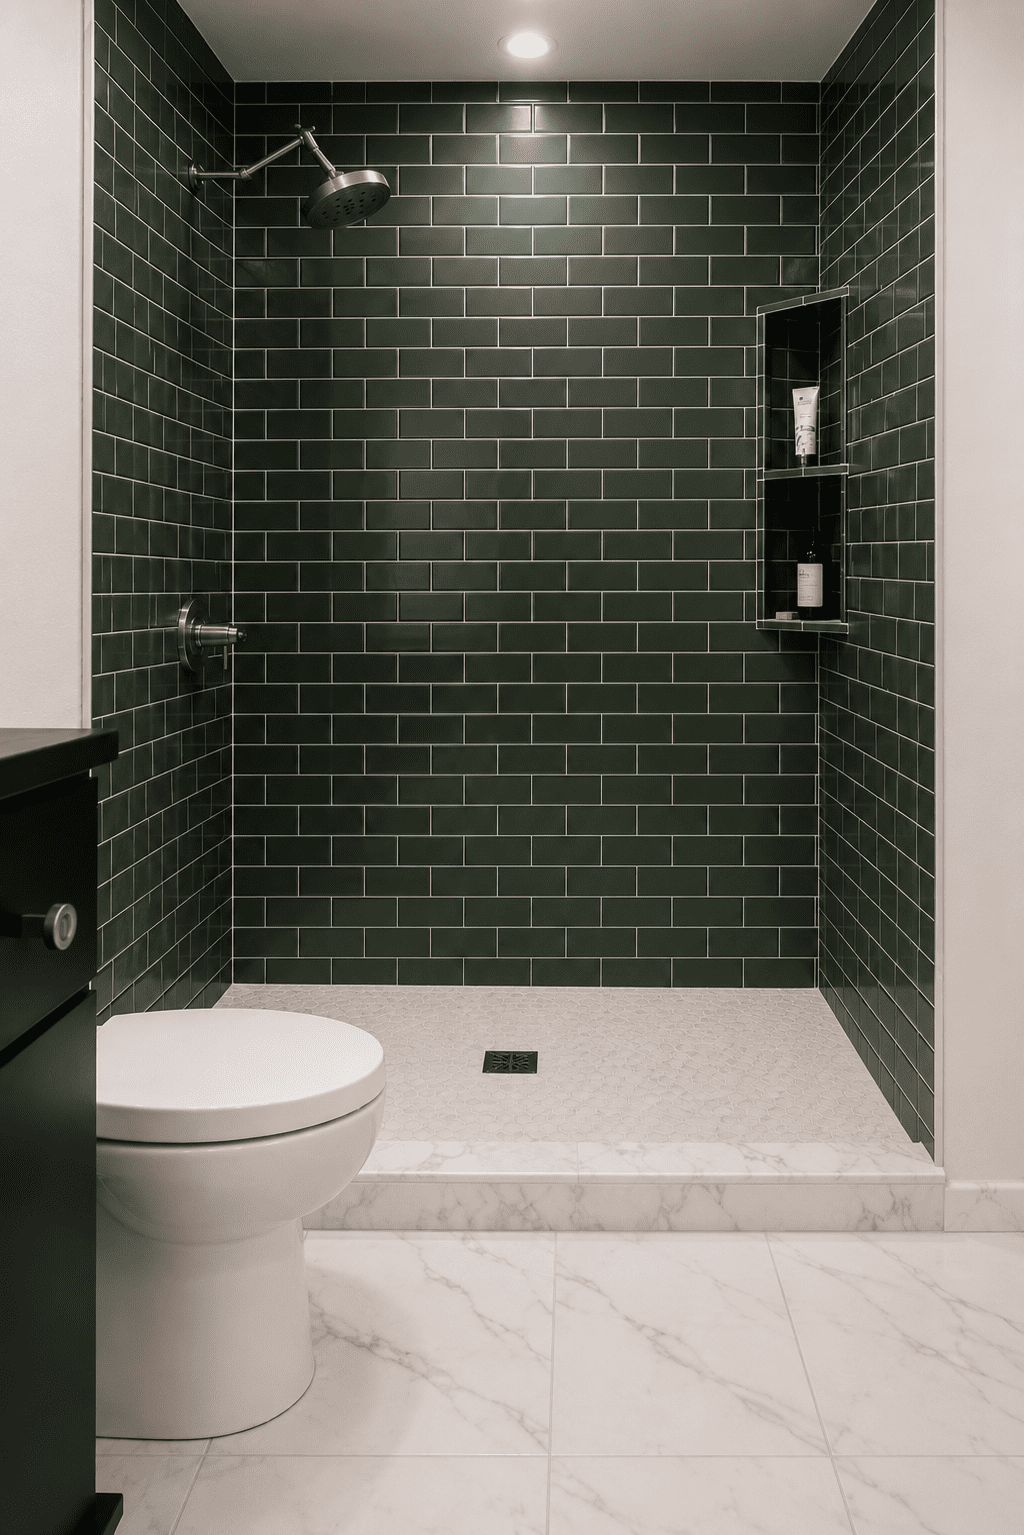
Tile or acrylic surround
Acrylic goes faster — panels cut to fit, sealed at the seams, done in a day. Tile takes longer and is where the craftsmanship shows: layout planned to avoid awkward cuts at the edges, niches framed and waterproofed before any tile sets, large-format pieces leveled with a clip system so nothing telegraphs after grout. Either way, the finish ties directly back to the waterproofing underneath — we don't trust the tile to keep water out, we trust what's behind it.
Step 05
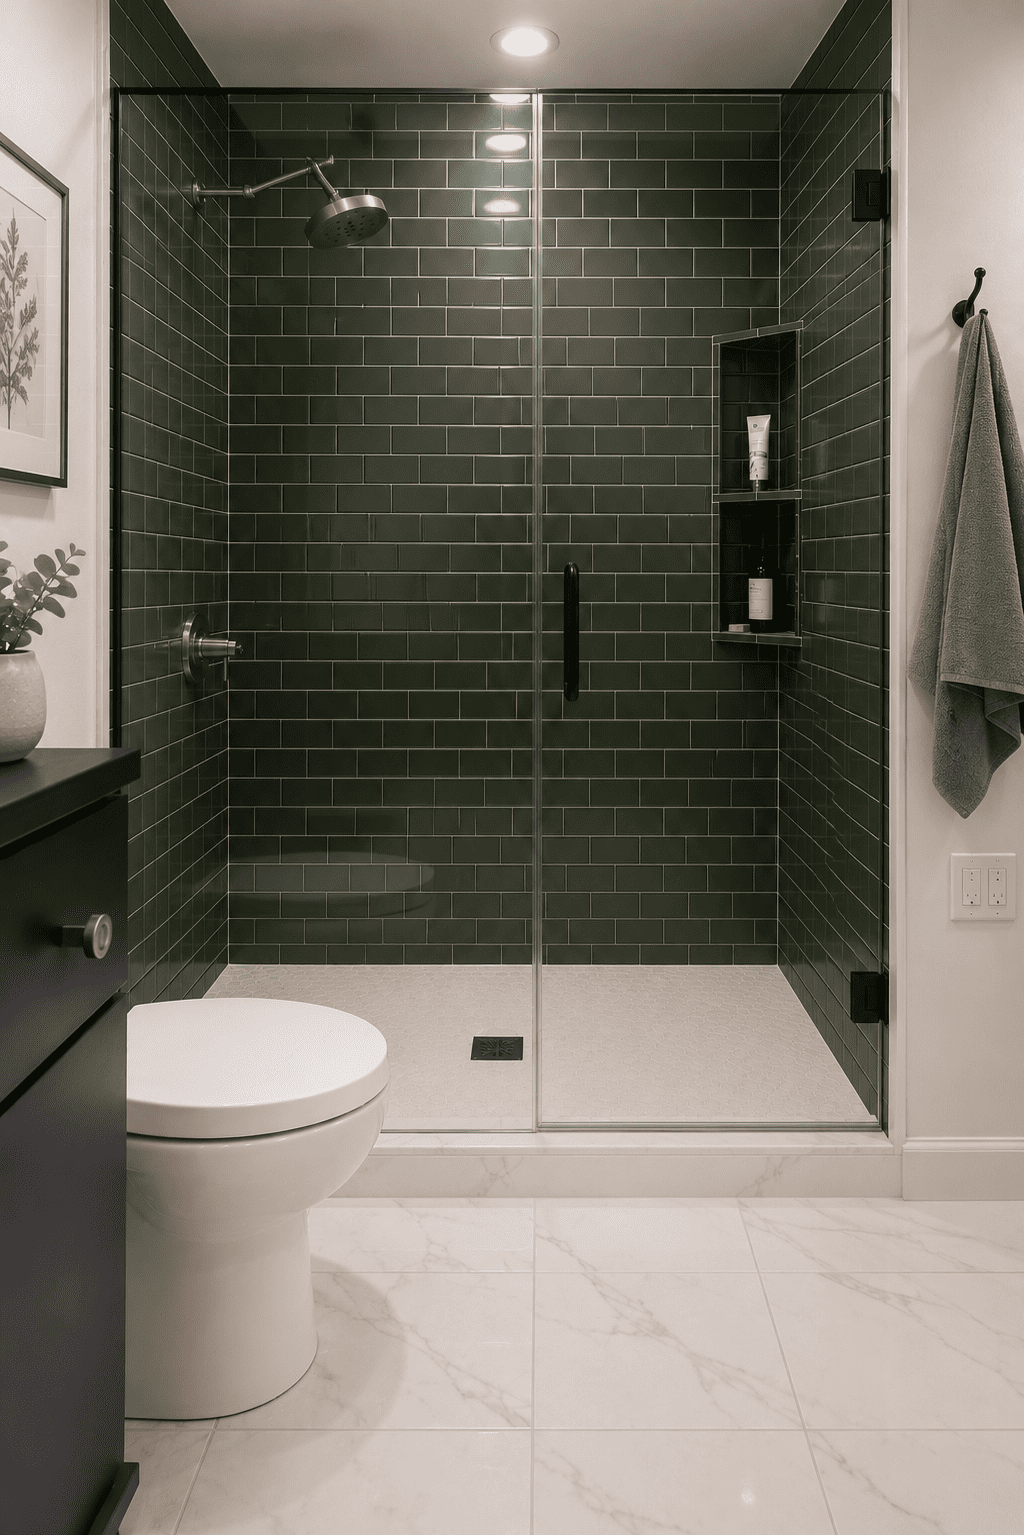
Fixtures, electrical & finishing
The shower trim goes on, the glass door gets templated and installed (frameless takes a return visit — the glass is custom-cut from measurements taken after the tile is set). Any electrical work happens now: pot lights over the shower if you want them, a GFCI outlet relocated to meet code, switches relocated if the layout shifted. The drywall around the new opening gets patched, sanded, and painted. By the end of this day the room looks like a finished bathroom — not a construction site with a working shower in it.
Step 06
Final walkthrough
We go through the finished space together: run the water, test the valve, check the door seal, walk every grout line and corner. You get photo documentation of the waterproofing layers — taken before the tile went on, before they got covered up forever — so you have a record of what's behind the wall if you ever need it. Then we hand it over. The work is warrantied; the photos are yours to keep.
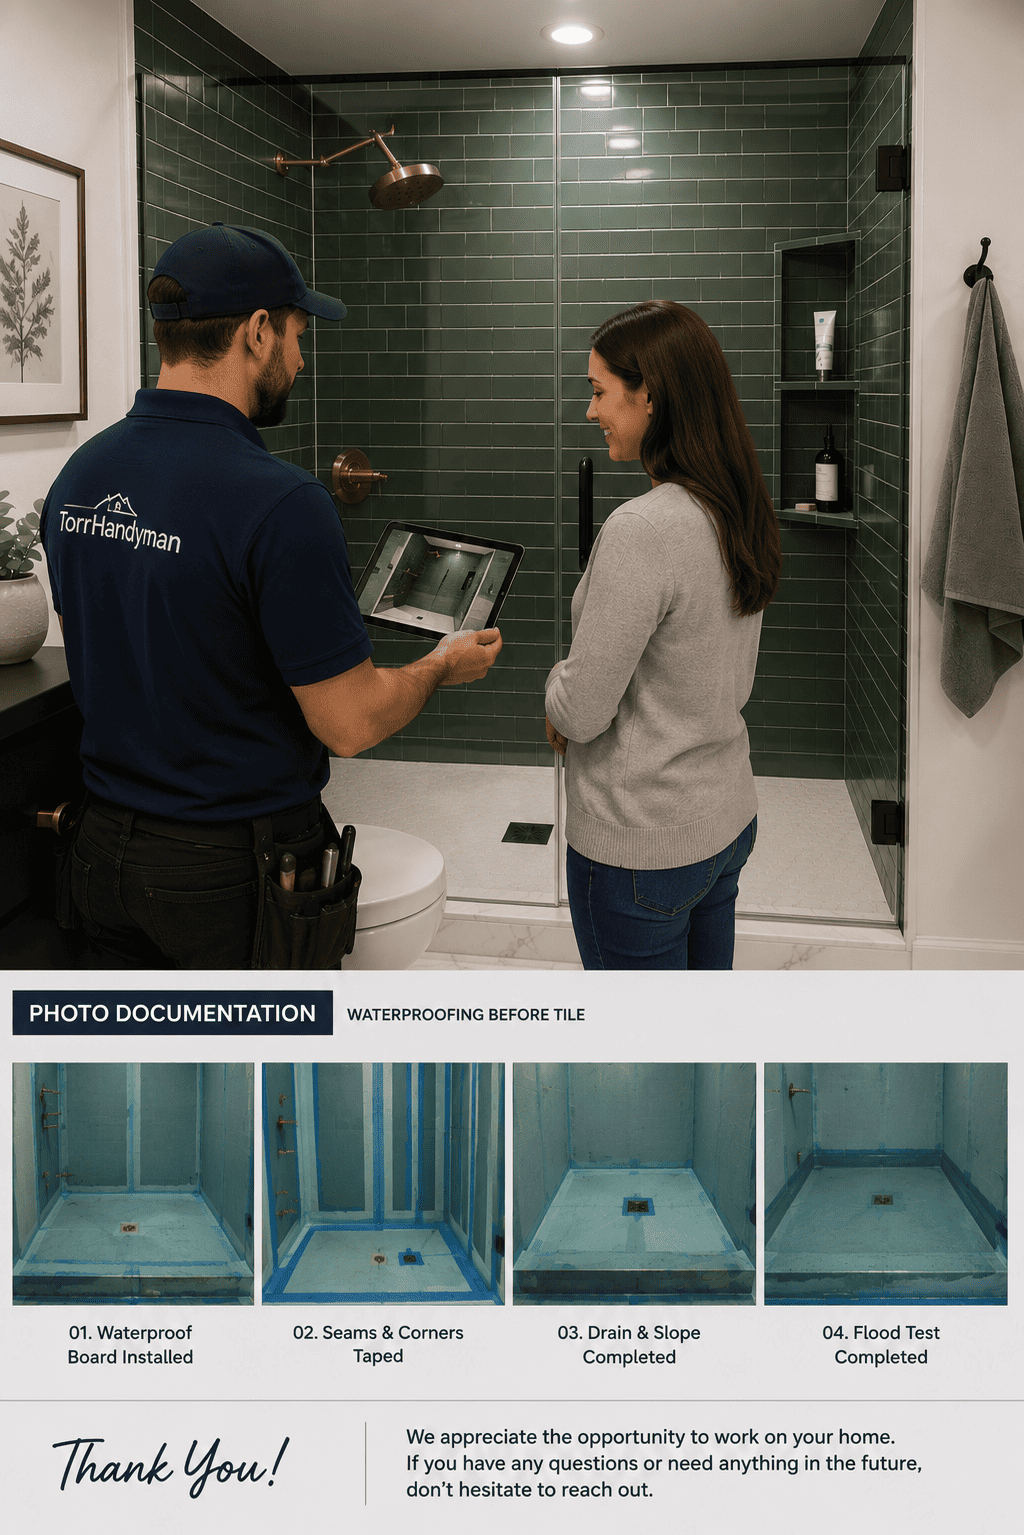
Acrylic vs. tiled: which makes sense?
Neither option is “better” outright — it depends on the bathroom, the budget, and how long you're staying.
Acrylic conversion
From $10,000
Houses · From $11,000 in condos
Tiled curb or curbless
Most PopularFrom $10,900
Full 3-piece condo bathroom from $14,500
Keeping costs near the lower end? The biggest drivers are moving the drain or plumbing venting, upsizing or custom-shaping the glass, and upgrading to premium tile or fixtures. Keep the existing plumbing layout and choose from our standard tile and glass options, and most conversions land at or near the starting prices above.
Condo tub-to-shower conversions
A good chunk of our conversion work is in downtown Toronto and North York condos. Condo jobs come with their own logistics: elevator booking, building insurance certificates, property management paperwork, and work-hour restrictions. We handle all of that as part of the job — not as a surprise add-on partway through.
Acrylic conversion in condos
From $11,000
Slightly higher than houses due to elevator/logistics overhead
Full 3-piece condo bathroom (tiled)
From $14,500
Tile and fixtures included; custom glass priced separately
Example project pricing
What a representative tub-to-shower conversion costs all-in, plus what's covered after the work is done.
What drives the final price
Example: curbless tile + toilet + vanity + electrical
For a representative project — replacing a tub with a curbless tiled shower, plus a new toilet and vanity, with plumbing staying in its existing location — the scope covers demolition, sealed waterproofing, tile, plumbing fixture hookups, a new vanity, faucet and toilet, electrical (pot lights, switch, GFCI outlet), mirror, accessories, drywall repair and painting.
All-in pricing
$13,500 – $16,500
Before seasonal promotions. Fixed, itemized price confirmed after site visit.
Ask about current seasonal pricing offers when you book your site visit.
2–5 year workmanship warranty
Upgrades and accessibility options
Two ways to make your shower do more — whether the goal is everyday comfort or easier long-term access.
For Comfort & Style
Popular upgrades
The most common upgrades requested at the site visit.
For Long-Term Access
Accessibility & aging-in-place
If easier or safer access is the goal — for yourself now or aging in place down the road — a curbless conversion removes the step-over entirely. Tell us this is a priority at the site visit so we plan the drain, slope, and supports from day one.
Permits and code
Permit likely required
Often no permit needed
We confirm which applies during the site visit, handle the paperwork and inspections if a permit is needed, and never bill for permit coordination as a surprise add-on.
Our process
Most conversions take 7–14 days from start to finish — acrylic installs are faster, fully tiled and curbless conversions take longer due to waterproofing cure times.
Site visit & quote
We assess your bathroom, talk through acrylic vs. tile, and give you a fixed, itemized price — not a vague estimate.
Scheduling & protection
We confirm timeline, book any condo logistics (elevator, building paperwork) if needed, and protect the space before work starts.
Demo, plumbing & waterproofing
Including a flood test before any tile is installed. Leaks are caught while they’re still easy to fix.
Tile or acrylic, fixtures & finishing
The part that makes it look finished — tile or acrylic panels, fixtures, glass, drywall repair, and paint.
Final walkthrough
We walk the space with you, hand over photo documentation of the waterproofing, and confirm the job is fully done before calling it complete.
Frequently asked questions
Ready to replace your tub?
Get a fixed, itemized quote for your tub-to-shower conversion — site visit required, no guesswork pricing.
Book a Free Site VisitLicensed & insured · WSIB-covered · $2M liability · 2–5 year warranty
More from Torr Handyman
Service areas
Related renovation services
Bathroom Renovation Toronto
Full-service bathroom renovation — all phases, one team.
Accessible Bathrooms
Barrier-free showers, grab bars, and aging-in-place layouts.
Curbless Showers
Zero-threshold walk-in showers with proper drainage and waterproofing.